Untitled Document
Back to Checklist for Print Ready Files
- Document Size Specifications
- Color must be CMYK
- Resolution
- Typography
- Saving Your File
1. Document Size Specifications
To set up the Bleed:
Click File > Document Setup...
Type in 0.125 in all 4 boxes shown below
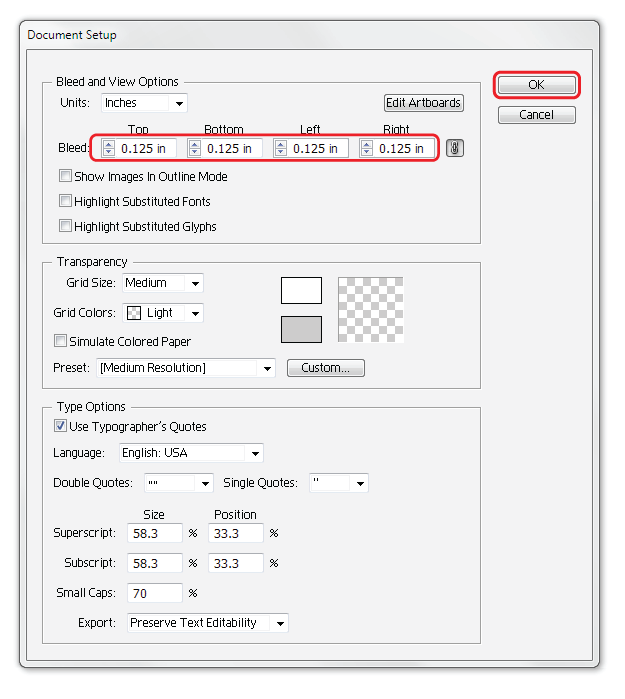
Click OK
To set up the Safety Zone:
Select the Rectangle tool
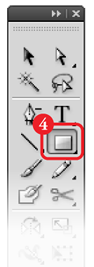
Now click once anywhere on your document

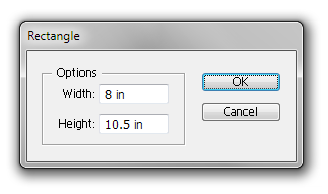
In the "Rectangle" window, type in the boxes the size of your page MINUS .25 inch.
For example, if your page is 8.5 x 11, you would enter in the Rectangle box Width: 8 in and Height: 10.75 in.
Click OK
Now with that box selected, you will center it precisely on the page:
Press Shift+F7 on the keyboard to bring up the ALIGN box.
Follow these steps:
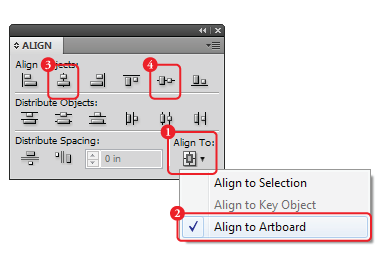
Now make the box a guideline by pressing Ctrl+5 (Command+5 on a Mac)
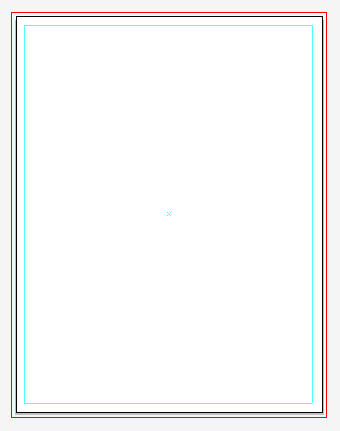
The box will show up as a light-blue margin that you can see but will not print. Keep anything important inside of this Safety Zone.
back to top
2. Color must be CMYK
To ensure your illustrator file is in CMYK:
Click File > Document Color Mode > CMYK
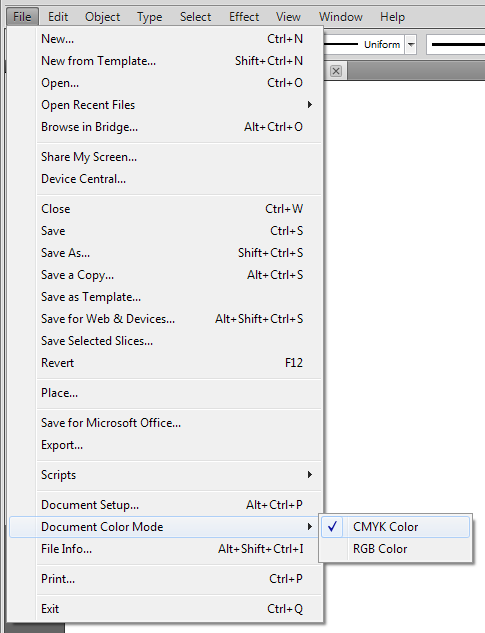
This only sets the color mode for the file, there may still be artwork and/or photos in RGB mode in your file.
To convert artwork or photos in Illustrator to CMYK:
With the item selected, click Edit > Edit Colors > Convert to CMYK
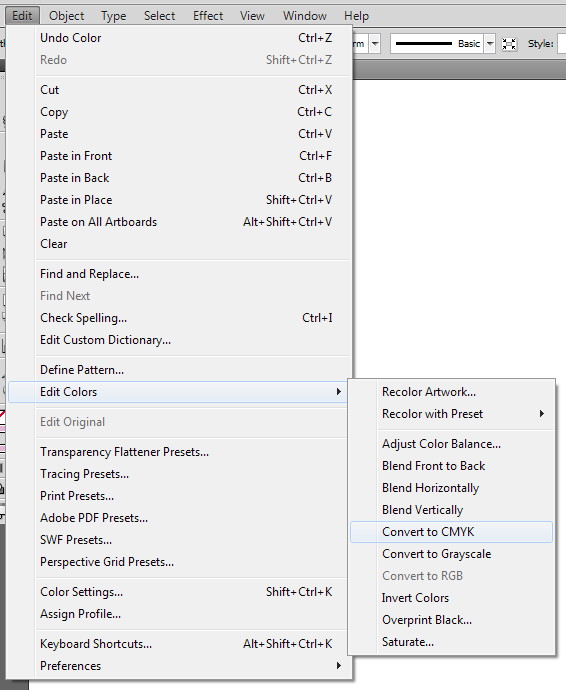
To convert everything in the document you can select All first and do this.
To create rich black for black bacgrounds and other large areas of black,
Set all four CMYK sliders
to100%.
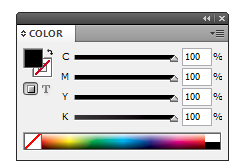
For black text
you should only use
100% K (black)
back to top
3. Resolution
To ensure your outputted PDF from Illustrator is at 300DPI:
Click the Effect > Document Raster Effects Settings...
Set all options as below:
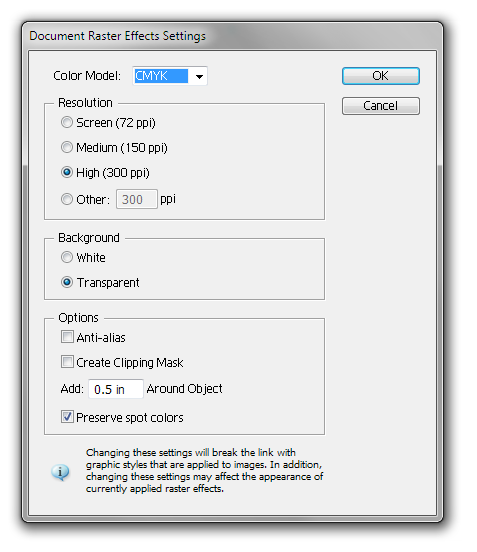
Click OK
To check the resolution of a photographic image:
With the image selected,
Press Shift+F3 to bring up the DOCUMENT INFO window.
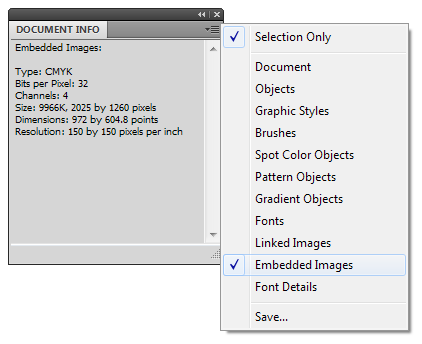
1. Click the menu button in the window
2. Choose Embedded Images in the list (if the image is linked, choose Linked Images)
The resolution will show in the DOCUMENT INFO window. If the image is below 300DPI it will print pixelated. You can either use a higher resolution image, or make the image smaller until it reaches 300DPI.
 |
 |
Tip:
Zoom in 300-400% to see the printed resolution. |
Image printed at 72dpi
|
Image printed at 300dpi
|
|
back to top
4. Typography
Converting type to oulines
Before proceeding - save a backup copy of your file to make changes to later.
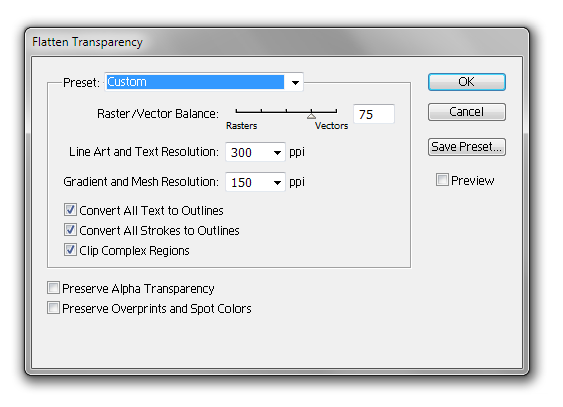
To convert fonts to outlines and Flatten your file:
Press Ctrl+A to select all (Cmd+A on a mac)
Click Object > Flatten Transparency

In the Flatten Transparency box:
Check "Convert All text to Outlines" and "Convert All Strokes to Outlines"
Uncheck "Preserve Alpha Transparency" and "Preserve Overprints and Source Color"
The text is now objects, you can apply fills and strokes to them, but you cannot type to edit the text anymore. (this is why you kept a backup file, just in case.)
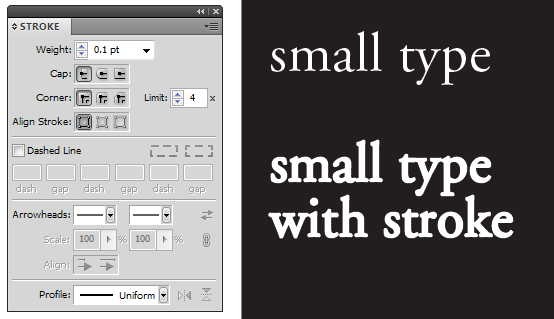
Tips for text:
When printing reversed text, such as white on rich black or dark colors, with small type below 8-pt, you should add a thin stroke (between .1pt to .25pt) of white (or light color) to compensate to avoid color overlapping and filling the text:

back to top
5. Saving Your File
To print, you must save your Illustrator file as a PDF:
When saving your PDF be sure to choose [PDF/X-1a:2001] from the list of presets
If your design goes all the way to the edges (full bleed) you'll also choose "Marks and Bleeds" from the list on the left in the PDF save box, and type in .125" into each bleed box
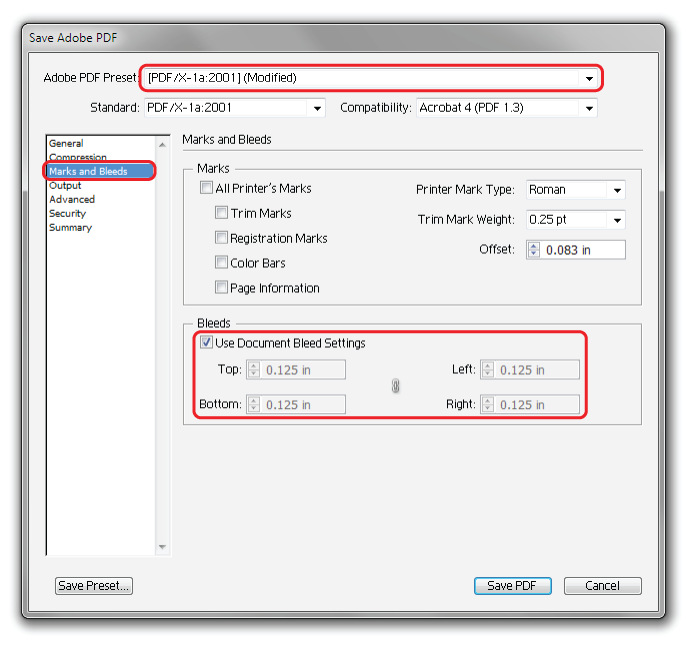
Click Save PDF
back to top