Untitled Document
Back to Checklist for Print Ready Files

- Document Size Specifications
- Resolution
- Typography
- Color
- Saving Your File
1. Document Size Specifications
To set up the Bleed:
Click File > Document Setup...
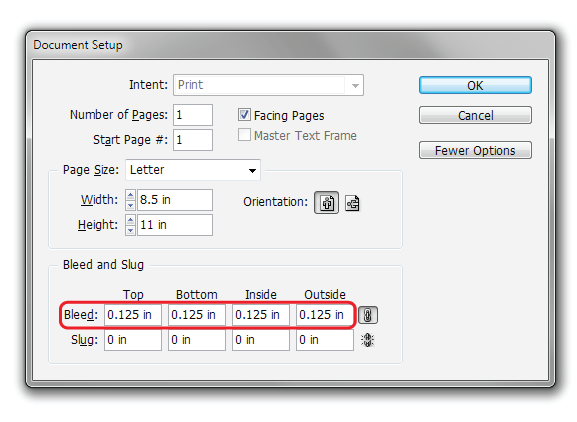
In the window click the "More Options" button.
Under "Bleed and Slug" type in the "Bleed:" boxes: 0.125 in in all 4 boxes (Top,Bottom, etc.)
Click OK
To set up the Safety Zone:
Click Layout > Margins and Columns
In the "Margins" section, type into each box 0.125 in
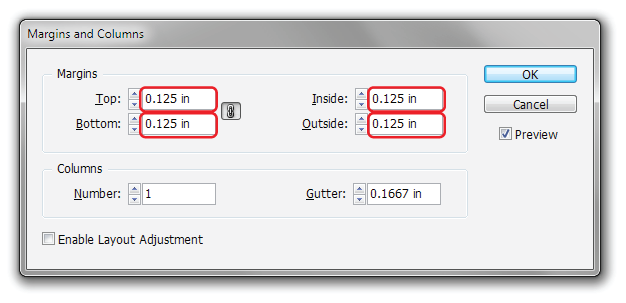
Click OK
You'll now see your page (black outline) the bleed (red outline) and the safety zone (magenta outline).
back to top
2. Resolution
To ensure your outputted PDF from Illustrator is at 300DPI:
check the resolution of a photographic image:
With the image selected,
Press F8 (or click Window > Info) to bring up the INFO window.
The Effective ppi will show in the INFO window. If the image is below 300ppi it will print pixelated. You can either use a higher resolution image, or make the image smaller until it reaches 300DPI.
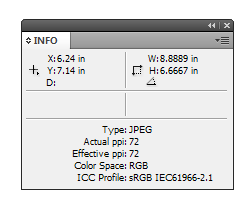
this function only works if you placed the image
in InDesign using File>Place from a file
back to top
3. Typography
Converting type to oulines
Before proceeding - save a backup copy of your file to make changes to later.
To convert fonts to outlines:
Select the text, and click Type > Create Outlines.
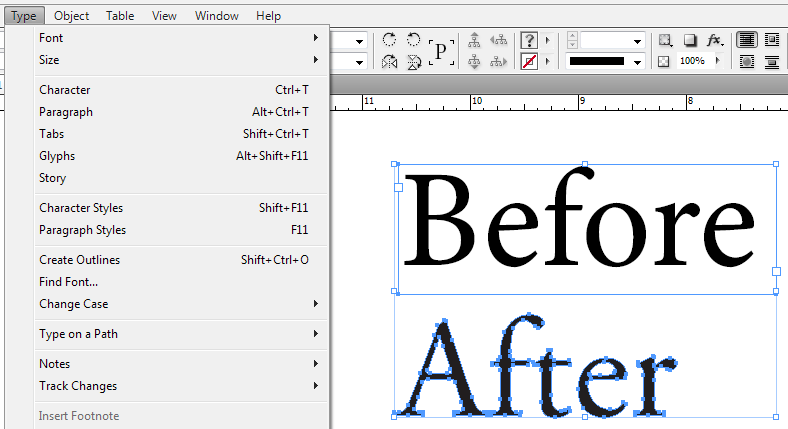
The text is now objects, you can apply fills and strokes to them, but you cannot type to edit the text anymore. (this is why you kept a backup on the hidden layer, just in case.)
Tips for text:
When printing reversed text, such as white on rich black or dark colors, with small type below 8-pt, you should add a thin stroke (between .1pt to .25pt) of white (or light color) to compensate to avoid color overlapping and filling the text:

back to top
4. Color & Black
Use only CMYK imagery and photos:
Use the method to check image DPI to verify your images are CMYK. If they are RGB, edit the file in PhotoShop or another image editor to convert the image to CMYK. InDesign cannot convert the image. While conversion does take place when exporting the file as a PDF, you will have no control over the results.
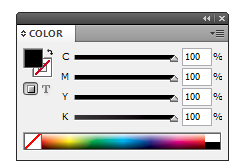
To create rich black (for heavy areas of black) Set all four CMYK sliders to100 %
For small black text on white, you should only use 100% K (black)
back to top
5. Saving Your File
For best results, save your InDesign file as a PDF:
Click File > Export. In the Save As Type: box, choose Adobe PDF (Print). Click OK. Now choose [Press Quality] from the list of presets (it is already set to 300DPI)
If your design goes all the way to the edges: (full bleed) you'll also choose "Marks and Bleeds" from the list on the left in the PDF save box, and make sure .125" bleed is set on all sides.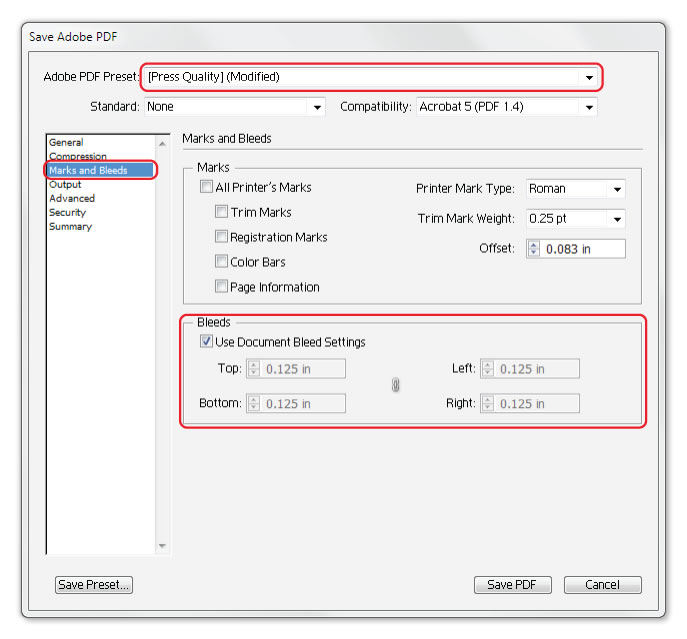
For complex and multi-page orders or if you are uncertain about pagination, you may supply us with a Packaged INDD file.
To Package your file, click File > Package, click "Package..." and save the entire folder created (with all subfolders and files) and send files as a ZIP or other compressed format.
back to top