Untitled Document
Back to Checklist for Print Ready Files

- Document Size Specifications
- Resolution
- Typography
- Color
- Saving Your File
1. Document Size Specifications
- Before using a file to print, you should set up a new document with the correct dimensions for a bleed. Keep in mind that if your design extends to the edge of the page, you must have a bleed that extends outside of the page you want printed, so you must design your artwork ahead of time with extra space. if your artwork is less than .5" from the edge, you cannot stretch it to fit, you must design it from the beginning to be print-ready.
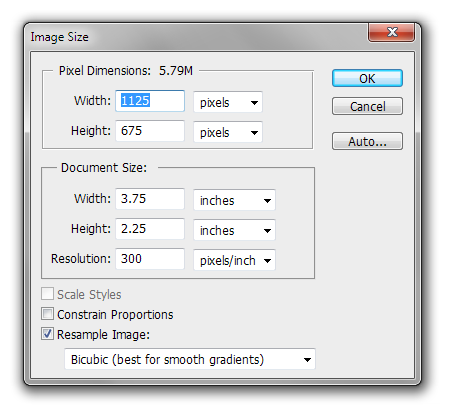
- Because PhotoShop is not a page layout program, you must do some math: your page size in PhotoShop will be the size you want, PLUS .25". For example: a 3.5" x 2" business card MUST be set up as 3.75" x 2.25".
To create a new print-ready document:
Click File > New...
In the Width: and Height: boxes, type in your document size in inches (including bleed). Choose "inches" from the pixels box if inches is not already selected.

Fill out the rest of the box as above
Click OK
To set up the Bleed zone:
Click View > New Guide...

Click Horizontal
Type in Position: .125
Click OK
Repeat the steps above choosing Vertical .125
Repeat the steps above again now adding .125 to the size of your final desired page. For example, if you have a 3.5" by 2" horizontal business card, you'll have 3.625" and 2.125".
You will see 4 light-blue lines, the space inside these lines is where you can put text and important imagery, you must fill the canvass but anything beyond these lines will be cut off.
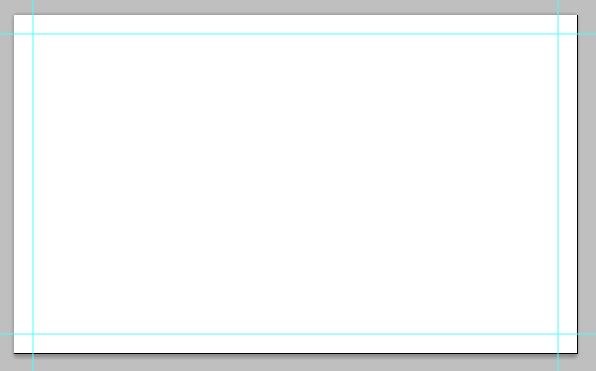
With the design, it should look like this:
To set up the Safety Zone:
Follow the instructions above for the Bleed zone, substituting .25" for .125", the resulting area is the safety zone where it is safe to place your design free from the possibility of being cut off.
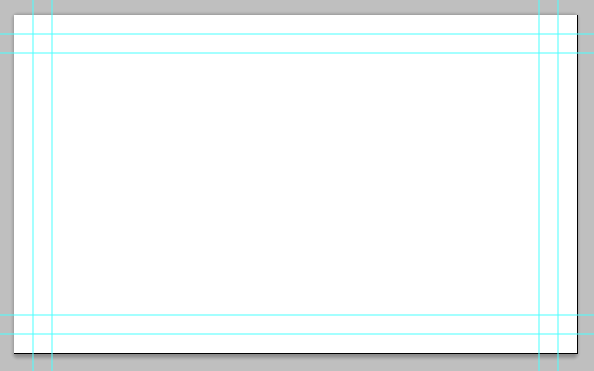
With the design, it should look like this:

back to top
2. Resolution
To ensure your outputted PDF from is at 300DPI:
Click Image > Image Size...
In the Resolution: box, type in 300 (if it is not already set to 300)
To see an approximation of the resolution quality that will be printed, zoom in to 300%
About using PhotoShop for print:
PhotoShop is not meant to be used for page layout. Photographs from PhotoShop should be imported and then text set in a true page-layout application such as Illustrator or InDesign. Deciding to use PhotoShop will likely result in pixelated low-quality imagery if even the slightest deviation from these minimum requirements aren't met. It is for these reasons that we do not recommend it for print.
back to top
3. Typography
Outlining Type
Fonts become pixels in PhotoShop, therefore it is not necessary to outline the type. Keep in mind that if you do not have the font installed on your computer, neither you nor we will be able to make changes to the text in the future.
Tips for text:
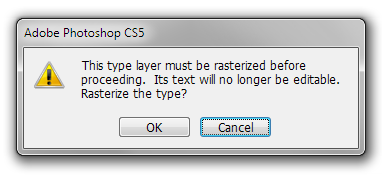
While working with text in PhotoShop, if you receive any warnings about the type layer being rasterized, you should avoid doing so (until saving your file for print). Flattening text converts it permanently to low-resolution pixels, which will degrade printing quality if it is edited further.
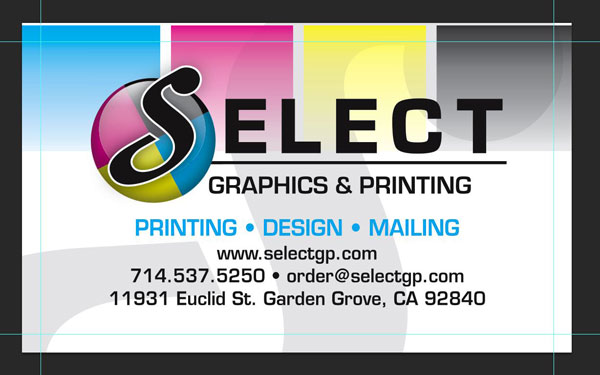
When printing reversed text, such as white on rich black or dark colors, with small type below 8-pt, you should add a thin stroke (between .1pt to .25pt) of white (or light color) to compensate to avoid color overlapping and filling the text:

back to top
4. Color & Black
To ensure your PhotoShop file is in CMYK:
Click Image > Mode > CMYK Color
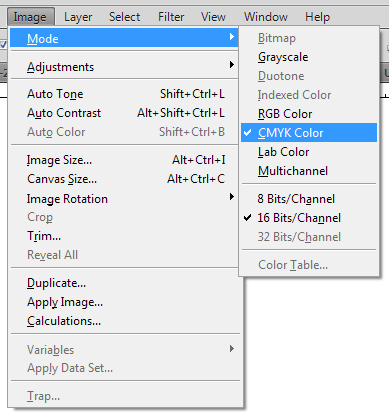
This sets the color mode for entire file and everything in it. If there is any RGB imagery or colors in the file, they will be converted to CMYK, take note during this convergence, your colors and image tone may change.
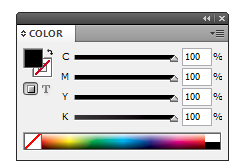
To use rich black (for heavy areas of black) Set all four CMYK sliders to100 %
For small black text on white, you should only use 100% K (black)
back to top
5. Saving Your File
Flatten the file
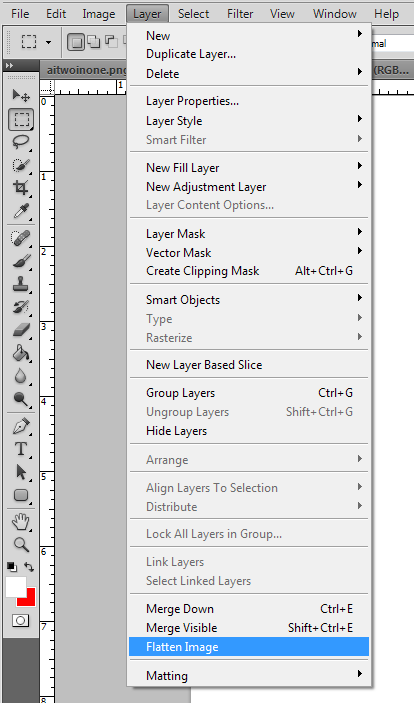
Before saving your PhotoShop file for print, you must "flatten" the image.This will remove all layers and reduce the size of your file significantly.
Flatten your Photoshop document by clicking the Layer Menu > Flatten Image.
Save as PDF
To print, you must save your PhotoShop file as a PDF:
Click File > Save As
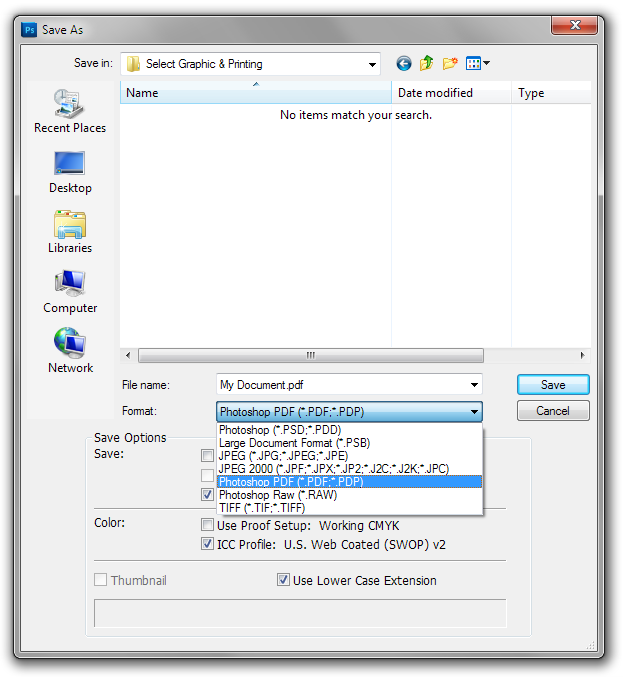 In the Format: box, choose Photoshop PDF.
Click Save.
At the next window that appears, choose [Press Quality] from the list of presets.
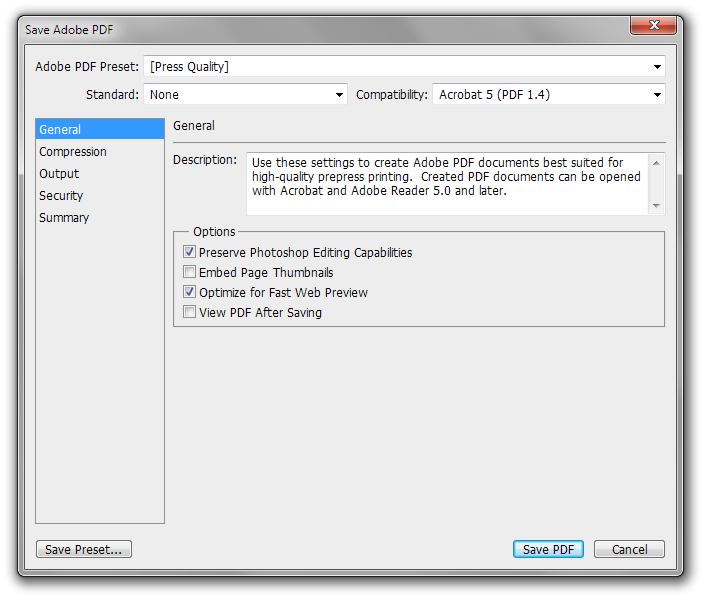
Click Save PDF.
Open the new PDF file to double check your file to ensure it has the proper size, which is the desired page size, plus .25 (.125 on each side).
back to top